Outdoor table and chair inspection

1. Outdoor furniture for Contract use

Use outdoor furniture in public places, such as restaurants, hotels, swimming pools, tourist resorts. Due to the public use of furniture, so there are high pressure requirements.

2. Outdoor furniture for Domestic use

Use in private situations, such as garden, balcony, terrace.

3. Outdoor furniture for Camping use

Easy to carry, folding and disassembly, lightweight construction, used for camping or tourism. Such as fishing chairs, beach chairs

1、Assembly check (according to instruction manual)

2、Loading check:

-For camping chair: 110 kgs on seat last for 1 hour

-For domestic chair: 160 kgs on seat last for 1 hour

For table: camping: 50 kgs, domestic: 75kgs (force apply on center of
table)

If the length is more 160cm, two forces were apply on longitudinal axis of
the table top with a distance of 40cm on either side of the transversal
axis.

3、Impact check for Chair

Procedure: Free drop 25kgs load from xxcm height for 10 times,

To check if any deformation and breakage was found on chair.

4、for child Loading and impact check with half weight of adult ,if the
claimed max weight is heavier than half of adult ,we use claimed max weight for
check.

5、Moisture content check

6. Coating adhesive check by 3M tape

7. 3M tape check for painting

Watch inspection process

Watch inspection process

(1) Appearance inspection: observe whether the marks on the dial, back cover and crown are consistent, and check the case, surface and hands for serious scratches.

(2) Sensitivity test: In the state where the mainspring is completely relaxed, move up and down three times. If the sensitivity of the second hand movement is deemed acceptable, otherwise it is not sensitive.

(3) Sound check: When winding, the movement must not “click”. If there is sound or slipping, it means that there is a problem with some of the previous parts. In addition, if the interval between the “snoring” sounds heard by the watch is significantly different, it means that the watch has a serious deviation phenomenon. If the sound is fast and chaotic, it indicates that there is a swing phenomenon.

(4) Checking the setting hand: When setting the hand counterclockwise, the second hand can stop or go back, but when the setting hand is stopped, the second hand should start to move again. Otherwise, it indicates that the sub-wheel in the movement is not tight.

(5) Coincidence check: Turn the hour, minute and second hands to the overlapping position, and check whether there is any friction between the second hand and the glass, between the hour hand and the dial and the three hands. Then observe it step by step at 3, 6, 9, and 12 o’clock.

(6) Calendar check: When checking the watch with the day of the week and calendar display function, there should be no skipping characters or skipping characters.

(7) According to national standards, according to timing accuracy, domestic watches are divided into 4 grades, and the daily differences of the first, second, third, and fourth grades are large or less than ± 30 seconds, ± 45 seconds, ± 60 seconds, and ± 90 seconds, respectively.

How to improve product quality

Complete quality management control process


1.QCC: Quality Assurance Circle. Including IQC, IPQC, FQC, OQC, QA, QE, TQC, etc.

2.IQC: Inspection of incoming quality. After the material demand order is issued, the company performs acceptance inspection on the products supplied by the supplier. IQC is established on this basis, and its role is to ensure the soundness of the company’s material inventory. Depending on the company’s material inspection standards, the number of people in this department will vary. Classes, groups, or classes can be set up (depending on the size standard) (full inspection, random inspection)

3.IPQC / PQC: Process inspection. After the acceptance of the materials, due to batch sampling and storage in the warehouse area, there will also be quality problems during the process. Therefore, when the product is online, it is required to determine the quality of the first product. Confirmation of parts and quality specifications and supervision during batch production. So as to improve the yield of process products and reduce costs

4.FQC: This is a comprehensive unit. Called warehouse inspection, also called final inspection (process). After the production is completed, the product flows to the offline line, that is, the package is put into storage. In the process, FQC will conduct a comprehensive quality inspection of the product, including packaging, performance, appearance and so on. Guarantee the performance, appearance, packaging of the stocked products and meet the requirements. According to the needs of customers and the need for production control, full inspection and packaging can be set. To put it plainly, it is a group of production personnel who are engaged in packaging inspection and storage after quality training, and are under the line process. It can also be completed by the production unit, and FQC will conduct random inspection and storage.

5.QA: Quality Assurance Engineer. This is a job description and should be said to be the quality assurance team. It is a unit within the company to improve the investigation of customer complaints, and propose process optimization programs to improve product quality.

6.QE: Quality Customer Complaint Processing Engineer. This is a unit for external quality description, processing, and coordination. It is a unit that directly coordinates, explains, and processes with the business and client. Including system file control, customer complaint 8D response, program file formulation, etc.

7.TQC: Total Quality Management. It is a new management concept, a new concept that brings quality into the fields of cost and delivery. On the basis of the original requirements for more fields, so as to improve corporate credibility and more comprehensive control of quality.

Six considerations for quality management
I. Quality Management Planning
1. Job responsibilities of the quality control department (including the duties of the quality control department, the duties of relevant personnel, and the duties of relevant work links).
2. Responsibilities of quality control of relevant departments (including overall duties of relevant personnel and specific duties of relevant departments).
3. Formulation and implementation of quality policy (including formulation of quality policy, implementation of quality policy).
4. Quality target formulation and implementation (including quality target formulation, quality target implementation).
5. Quality standardization management (including clarifying the role of standardization management, formulating standards, implementing standards, and revising standards).
6. Quality model management (including procurement model management, production model management, customer sample management).

Second, quality resource management
1. Implementation and management of quality training (including clarifying the purpose of training, determining the content of training, and implementing training).
2. Quality cost analysis (including quality cost classification, quality cost management division, and quality cost management steps).
3. Quality information management (including the quality information management process, the main content of the quality information center, the use of daily quality information)
Processing of quality information).
4. Quality management work environment management (including, determining the necessary factors of the work environment, establishing the necessary work environment, and maintaining the established work environment).
5. Relevant supplier management (including determining the needs of the supplier, establishing two-way communication with the supplier, determining the supplier’s process capability, and monitoring the supplier’s delivery status
Suppliers, encourage suppliers to implement continuous improvement programs, invite suppliers to participate in design and development activities, evaluate, confirm, and reward suppliers with excellent performance,
Internal Loss Cost Statistics Table 2 External Loss Cost Statistics Table 3 Identification Cost Statistics Table 4 Prevention Cost Statistics Table 5 Waste
Product Loss Summary Table Table 6 Information Liaison Table Table 7 Annual Supplier Evaluation Form).

Third, quality management tools
1. Section 1 Pareto chart method (including making Pareto chart, analyzing Pareto chart, precautions for using Pareto chart method).
2. Causality diagram method (including clarifying the principle of using causality diagram, making causality diagram, analyzing causality diagram).
3. Scatter diagram method (including making scatter diagram and analyzing scatter diagram).
4. Control chart method (including clear control chart principle and making control chart).
5. Association graph method (including distinguishing the types of association graphs and making association graphs).
6. Affinity diagram method (including determining the subject, forming a group, collecting information, writing cards, summarizing and organizing cards, making label cards, and drawing).
7. System map method (including determining the purpose, proposing means, measures, evaluation means, measures, making cards, preliminary drawing, confirming the purpose).
8. PDPC method (including clarifying the use of PDPC method and applying PDPC method).
9. Arrow-line diagram method (including clarifying the application range and application of arrow-line diagram).

Fourth, quality measurement management
1. Management of standard measuring instruments (including the implementation of classification and verification of standard measuring instruments, standardizing the use of standard measuring instruments, and clarifying standard measurement
Note on appliance management).
2. Management of general measuring instruments (including verification of general measuring instruments and use of general measuring instruments).
3. Energy measurement management (including clarifying the energy measurement scope, equipped with energy measurement equipment, verification and maintenance, and clarifying the precautions for energy measurement management)
4. Selection of measuring instruments (including the factors considered in selecting measuring instruments, options for uncertainty selection, and steps for selecting measuring instruments).
5. Calibration of measuring instruments (including calibration types and calibration precautions).
6. Guidance for the operation of measuring instruments (including electronic scales, spring scales, hardness testers, vernier calipers, height rulers 6, thickness gauges, micrometers).
7. Internal calibration standards for measuring instruments (including internal calibration standards for hardness testers, internal calibration standards for depth gauges, internal calibration standards for height gauges, internal calibration standards for outside micrometers, 200-500mm caliper internal calibration standard, 200mm caliper internal calibration standard, thickness gauge internal calibration standard, electronic scale internal calibration standard, steel tape internal calibration standard, temperature
Internal calibration standards).
8. Weekly inspection of measuring instruments (including making a weekly inspection schedule for measuring instruments, submitting a weekly inspection plan for the next year, submitting a weekly inspection plan for the next month, issuing a verification notice, conducting a weekly inspection, and using unqualified measuring instruments are strictly prohibited).
9. Hierarchical management of measuring instruments (including Class A management, Class B management, and Class C management).

Five, quality inspection control
1. Classification and selection of inspection (including classification according to inspection quantity, order according to production process, classification according to inspection site, and classification according to data nature
Classification, classification according to inspection method, classification according to inspection purpose, classification according to inspection cycle).
2. Formulation of inspection plan (including preparation of preparation of inspection plan, contents of inspection plan, and production of inspection flowchart).
3. Feed inspection (including feed inspection overview, feed inspection process, feed inspection items and methods, selection of feed inspection methods, processing of inspection results, emergency release control during feed inspection).
4. Process inspection (including the purpose of process inspection, first-piece inspection, roving inspection, online inspection, completion inspection, and final-piece inspection).
5, semi-finished product quality inspection (including semi-finished product process control, semi-finished product quality inspection).
6. Finished product inspection (including packaging inspection, finished product warehouse inspection and finished product shipment inspection).

Six, non-conforming product control
1. Analysis of the causes of non-conforming products (including product development and design, machine and equipment management, materials and accessories control, production operation control
System, quality inspection and control).
2. Non-conforming product standards (including selection of markers, application of markers).
3. Isolation of non-conforming products (including planning non-conforming product areas, placing signs, and controlling goods in non-conforming product areas).
4. Evaluation of non-conforming products (including application for disposal of non-conforming products, verification application, review and judgment, final review and judgment, arrangement for processing, re-verification,
The QC department classifies the allowable products in allowable income positions).
5. Disposal of non-conforming products (including conditional receipt, picking, rework and repair, return, scrap, and records of non-conforming products).
6. Prevention and control of non-conforming products (including {implementation of preventive measures for non-conforming products, and implementation of corrective measures for non-conforming products}

Seven, quality improvement plan
1. Quality improvement organization and operation (including overview of continuous quality improvement, continuous quality improvement organization and operation).
2. Quality improvement (including the establishment of environmental management leadership, establishment of quality improvement values, attitudes and behaviors, specific formulation of enterprise quality
(Improved goals, mutually reinforcing working relationships, continuing education and training for all employees)
3. Development of quality improvement activities (including identifying improvement opportunities, identifying improvement projects, establishing quality improvement organizations, formulating quality improvement plans, quality improvement
Problem diagnosis, formulation and implementation of quality improvement programs, control and evaluation of quality improvement, verification and confirmation of improvement effects, maintenance of improvement results,
Improve the determination of the project)
4. Implementation of CC activities (including quality control circle overview, QCC team formation, QCC activity development, QCC activity results summary, QCC results release,
QCC activity evaluation, CC common problem solving, QCC successful implementation skills)
5. Implementation of TQM activities (including TQM characteristics, TQM activity content, QC team construction)
6. Sigma management (including {6Sigma management basic connotation, 6Sigma management implementation key, 6Sigma management basic process implementation}
7. Implementation of non-defective plans (including clarifying the prerequisites for the implementation of non-defective plans, implementation of non-defective plans.

How to improve product quality

Men’s shoes inspection key

A. facial precautions:

1.Do not loosen the skin. (such as genuine leather: toe, toe cover and outer waist, do not appear defective leather, such as insect spots, scratches, hemp spots).

2.Do not hair the toe, the back of the bag should be straight. The height of the waist must be strictly accurate.

3.Do not have floating line, broken line, more do not have no bottom line, jump needle.

4. Whether the ratio of toe tip warping is consistent or not, and whether the comparison is correct or not.

5.Do not crease the inside of the toe tip or make the foot, check whether to climb into the middle sole (consider putting the front port after the cotton shoes to help the front half of the foot car line).

6. Comparing with the sample shoes, whether the vamp is chromatic aberration, whether the brightness and polishing effect are the same as the sample.

7.Do not allow the shoe barrel to be unfitted or crumpled, the zipper to be smooth and the lock position to be firm.

8.Eye fastness is enough (men’s shoes with shoelaces), the position should not have obvious penetration marks, do not hit the foot.

9. Check if there is any drawing under the middle bottom plate, if there is any missing or missing port, or if the port is not hard enough (especially after port must be hard).

10.Check whether the trademark letter class is correct, indispensable letters.

11.No nails in it, no delamination, no wrinkling. The color of the leather should be dyed thoroughly, and the cutting edge should be of the same color.

12 upper toe position, back bag position can not appear, uniform line, can not jump line.

13.Men’s shoes should have eyelet buttons, lining shoes should be aligned, no rough edges, and punching holes should be smooth.

14. leather work shoes of various parts of leather to use, with a pair of to be sure.

15. Whether the port is pulled into the bottom plate. Whether the foot is soft

B. notes for bottom:

1 adhesive force, whether can reach the standard, because the male shoe sole adhesion, such as: with the hand to move in a certain situation does not open the glue, the other two waist can not be short of glue, glue line should be controlled within the scope, especially light color shoes.

2 all male footwear outsole to smooth, can not have steel core penetration marks, outsole can not have concave and convex and front and rear kick phenomenon.

3 the outsole can not be kicked back and forth, the toe head should be positive, the SIZE of the side and outsole must be correct.

4 big bottom, can not fade color, thickness. Soft and hard to reach the standard.

5 the bottom of the strip need to fit in place, there are wrap edge can not take edge, must be smooth, can not open the glue, the glue.

6 The treatment after the outsole must refer to the standard, not under the standard scope.

7 Middle sole, hot sole is rolled edge, insole is stuck firmly.

8. Check whether the middle bottom is made of hard steel and is resistant to bending. Check whether the material meets the company’s requirements.

C. Solidity precautions

1. Whether the tensile force and abrasion resistance of materials have passed.

2. Whether the finished product has passed the cold resistance tortuous test or not.

3 shoe tongue. Woven belt. After the belt and other parts by the tension of parts to reach the standard.

Standard Procedures for Daily Ceramic Inspection

Standard Procedures for Daily Ceramic Inspection

Check

1. Appearance: Appearance inspection is performed on each sample taken.

2. Lead and cadmium: If the foreign trade contract or the government of the importing country has provisions on the amount of lead and cadmium dissolution, the inspection shall be conducted in accordance with the prescribed standards and methods; if there is no regulation, the inspection shall be conducted in accordance with China’s national standards.

3. Physical properties: Foreign trade contracts that have provisions on physical performance inspections shall be inspected in accordance with regulations; if there are no regulations, random inspections may be conducted in accordance with China’s national standards.

4. Packaging: At the same time as sampling, the internal and external packaging should be inspected. Packaging should meet the requirements of firmness, dryness, cleanness, integrity, and long-distance transportation.

Recheck

The export ceramics failed the first inspection, and the inspector was allowed to re-inspect and re-inspect to the origin inspection and quarantine institution after rework. After rework, the re-inspection shall be accompanied by a rework report, but rework is allowed only once.

The export ceramics for daily use is valid for one year.

Claim

1. Inspection of the bearing capacity of the handle and mouth

Hollow products, such as cups, pots, cans, etc., are mostly used to hold food, and these products have external parts such as handles and mouths that can be used to lift items to move. Personal injury may occur when heating food.

The handle and mouth endurance test can simulate the process of lifting and moving food, such as adding a certain amount of wet quartz sand or iron balls in a cup, pot, can, etc. to check the handle and mouth endurance.

2.Surface scratch inspection

During the use of ceramic products, the use of knives and forks (two meals) with each other can cause scratches on the surface and affect the appearance.

The occurrence of scratches has a lot to do with the surface hardness of the glaze. The data obtained by the Vickers hardness standard inspection method are different from the actual use. Therefore, some companies now use Mohs hardness, metal knife, fork scratch Check by rubbing or rubbing with sandpaper.

A. Mohs hardness: use standard Mohs rock hardness blocks (10, 15 or more) to scratch the surface of ceramic products, determine the level of rock that can leave scratches on the ceramic glaze, report Its rank.

B. Scratches on metal knives and forks: Use metal knives and forks to scratch on ceramic products, and check whether there are scratches on the surface of the products.

C. Sandpaper friction: When a certain fineness of sandpaper is used to apply a certain force on the surface of the ceramic product, it is rubbed back and forth a specified number of times. After washing, it is coated with a dye and checked for abrasion.

3.Dishwasher-resistant inspection

For the dishwasher resistance test, the ability to resist acidic, alkaline, and neutral detergents during the dishwasher washing process is mainly tested.

For ceramic products, a certain number of washing cycles (such as 750 cycles on the glaze and 1000 cycles in the glaze (bottom)) are specified for the on-glaze decorative product and the middle (lower) decorative product, respectively, in acidic and alkaline Under neutral washing condition, complete the test to check the effect on the decorative surface and glazed surface.

4, Microwave oven test

Microwave resistance test can be divided into three kinds of tests:

A. Microwave inspection of decorative surface.

Put the ceramic with decorative pattern into a microwave oven (typically microwave power is 1000W), and work at full load for 5 minutes to check whether the decorative surface is damaged.

B. Examination of the influence of microwave on the surface temperature of the product.

Place the ceramic product in a microwave oven and work at full load for 5 minutes. Use a surface thermometer to measure the surface temperature of the product.

Ceramic products can be left in water for a period of time, and then the surface moisture is dried for testing, especially for products with large water absorption, such treatment should be performed first.

C. Microwave inspection of product damage.

Microwave inspection of ceramic products can be divided into two types.

(1) Put a sponge saturated with water into the ceramic product, cover it with a cover or a film, keep it at 4 Celsius for 24 hours, put it in a microwave oven for 5 minutes at full load, cool to room temperature, and cycle it for a certain period The number of times, check the damage of the sample.

(2) Put the ceramic products in the frozen condition for 16 hours, put them in a microwave oven and work at full load for 10 minutes, and check the sample for damage.

British traders continue to be bullish on the Chinese market

Colin rainsforth, manager of UK trader absolute advantage, said in an interview that the outbreak would not affect his company’s future business in China, xinhua reported.

‘China is a huge market of 1.4 billion people, with a rapidly growing middle class, and there is a huge demand for high-quality goods,’ Mr. Rainsforth said of the bullish case for China. Some world-renowned British brands of chocolate, ice cream and wine are favored by Chinese consumers. “I think there will be a lot more demand coming from China than from Europe and the us.”

Speaking about the potential impact of the current outbreak on the company’s business, rainsforth said: ‘the impact is not obvious at the moment. The impact in the future may depend on two things. One is China’s economic fundamentals and consumer confidence.’ The other is whether the export of some food raw materials such as condiments will be affected. “In the short term, the outbreak will affect China’s economic growth, but the impact will be temporary. “In the long run, the fundamentals of the Chinese economy remain positive.”

Rainsforth said the Chinese government has taken timely steps to mitigate the economic impact of the outbreak, “which is not only good for the Chinese economy, but also good for the world economy. This is a time when the world should unite, not isolate China, which would be bad for trade.”

“Staff in the Shanghai office will work from home until the 21st of this month. The current outbreak has not materially affected our work. Although the customer visit activity has stopped, we have no products in China, so the impact is not big.” “Said the head of a us asset management agency’s head of markets. Asked if the outbreak would affect the company’s licence application process, the marketing executive said: “it’s not a big deal, it’s still on track. I haven’t submitted my application yet. I will do my homework first.”

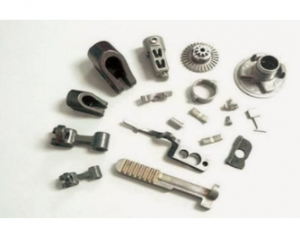
How to control the quality of mechanical processing parts

Nowadays, machining requires group cooperation to achieve the professional level of production technology. In this way, machining requires more outsourcing cooperation between manufacturers, but the quality of outsourced machining parts will directly affect the overall quality of the workpiece.Therefore, the management and control of outsourced processing is very important for mechanical processing. So how should the quality of outsourced processing be controlled?

How to control the quality of mechanical processing parts

1. Select outsourced manufacturers with better quality systems

At present, the quality management level of most mechanical processing manufacturers is still in the initial stage. There is no process and regular control. Such manufacturers will lack a comprehensive and systematic process of analysis, sorting, and resolution when there is a problem with an external work piece. Summarizing and solving related problems will cause many problems to recur and affect the quality of processing. Therefore, choosing a subcontracting manufacturer with a better quality system can avoid these problems to a certain extent.

2. The technical requirements of the workpiece must be accurately marked

When the workpiece is submitted to the subcontractor for processing, it is necessary to provide the clearly prepared drawings and related technical requirements documents to the subcontractor to inform them of the uncertain factors that may be encountered in the processing, so that the subcontractor can be informed in more detail. Technical requirements for workpiece processing, thereby reducing errors due to information transmission errors and improving the quality of the workpiece.

How to control the quality of mechanical processing parts

3. Choose a strong outsourcing vendor

When choosing a subcontractor, please do not choose a weak professional subcontractor in order to reduce costs. If you only choose the subcontractor to check the price without comparing the strength of the subcontractor, you do n’t know whether the subcontractor is clear. With relevant mechanical processing equipment and core technical personnel, this may cause the quality of outsourced machining parts cannot be guaranteed.

4. Establish effective information feedback

When abnormal quality is found during the machining process, if the information is not fed back in time, the abnormality is analyzed, sorted out, and related solutions are formulated, this may cause the workpieces to fail in large quantities and cause serious losses.

5.Speeding up network to provide solutions

At present, many of the mechanical processing on the market are still in the initial stage, the technical level and management level are not high, and there is no perfect quality management system. This will have a serious impact on the quality of outsourced machining parts. The quality of co-processed parts must first select a strong external contract manufacturer, Quick Add Network, and position it on the intelligent manufacturing cloud platform. The essence is to integrate the idle capacity of a large number of manufacturing factories and equipment distributed throughout the country. Comprehensive utilization of integrated capabilities, collaboration capabilities, and management capabilities; provide personalized, customized, and intelligent flexible processing solutions. From the processing feasibility analysis of drawings to automatic quotation by the system to intelligently matching the most suitable processing plants, the processing progress of each part is tracked in real time. Quality control mechanism of triple quality inspection (production inspection, factory quality inspection, quick-up quality inspection), customized packaging and postponed delivery mechanism, free after-sale mechanism for repair or reprocessing, thus ensuring the reliability of outsourcing.

Responsibilities of QC

1. Responsible for the post to carefully check and confirm the standards for all kinds of plastics, record the inspection results and quantity on the QC inspection report, calculate the number of qualified, number of rejected and defective rate of the day.

2. Responsible for notifying relevant management personnel of the detected defective products to take countermeasures immediately, and QC tracking and confirming the improvement effect.

3, Every time the product transfer, be sure to refer to the sample to confirm the appearance of oil injection/silk screen color, structure (insert) fitting is qualified.

4, Check the plastic products, must be light to handle light, bad products into the pull bottom, pay attention not to touch.

5. When the defective screen printing is detected, it shall be neatly placed on the defective product frame, and the name, reason, quantity, date and person in charge shall inform the shift leader to solve the problem immediately, and QC shall confirm the improvement effect.

6, when the injection QC inspection to beer plastic bad, immediately inform the group leader feedback injection QA review, when printing QC inspection to the injection non-conforming, immediately inform the injection QC review, when QA sampling to bad product, immediately inform the silk-screen QC review, when customer return bad product, QC inspection record against bad project, and analyzing the defective product causes, countermeasures and inform the related department and track the improvement effect.

7. During the shift handover, the QC shall explain the daily complaints on the production line, quality problems on the shift, handling methods, mold modification, newly issued technical documents and sample information, and make clear the handover, and both parties shall sign.

8. Always adhere to the concept of “7S” : ensure the cleanliness of the environment and the arrangement of materials within the work scope.

Matters needing attention for QC :

1. Do a good job in the statistics of basic data;

2. Analyze the direction and focus of improvement;

3. Further collect data for the target to be improved, and analyze the specific reasons for the improvement process;

4. Make specific plans for quality improvement;

5. Improve step by step.

6. Conclusion.

Infrared Thermometer Quality Control Inspection Service

Below are some common checking list for infrared thermometer quality control inspection service:

Infrared Thermometer Quality Control Inspection Service

1.Appearance

2.Quantity check

3.Measurement: Product specification

4.Smell test

5.Marking & labels check

6.Logo 3M Tape Test

7.Internal check

8.Barcode scanning

9.Function test

10.Carton dropping test

How to choose an infrared thermometer

The choice of infrared thermometer can be divided into 3 aspects:

(1) In terms of performance indicators, such as temperature range, spot size, working wavelength, measurement accuracy, window, display and output, response time, protection accessories, etc .;

(2) Environmental and working conditions, such as ambient temperature, window, display and output, protection accessories, etc .;

(3) Other options, such as ease of use, maintenance and calibration performance, and price, also have a certain impact on the choice of thermometer.

With the technology and continuous development, the best design and new development of infrared thermometers provide users with various functions and multi-purpose instruments, expanding the choice. Other options, such as ease of use, maintenance and calibration performance, and price. When selecting the thermometer model, you should first determine the measurement requirements, such as the measured target temperature, the measured target size, the measured distance, the measured target material, the target environment, the response speed, the measurement accuracy, whether it is portable or online, etc. ; In the comparison of various existing thermometers, choose the instrument model that can meet the above requirements; choose the best combination of performance, function and price among the many models that can meet the above requirements.